Easy Arts & Crafts To Do With Your Children This Christmas!!
November has only just begun, but it’s never too early to get into the holiday spirit. This
holiday season is the perfect time to slow down, get creative, and make lasting memories
with your children. You don’t need any fancy materials or to be the next Van Gogh, all you
need is just a bit of imagination, some basic materials, and a sprinkle of festive spirit!!
Here are some easy and fun children’s Christmas arts and crafts you can do!!
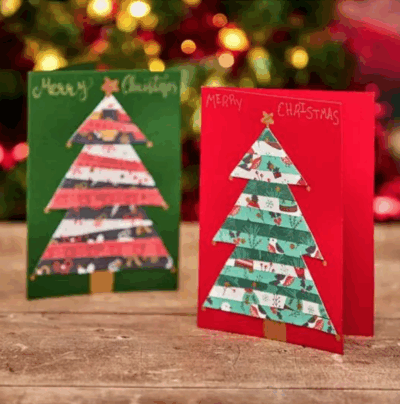
1. Level easy- Paper collage Christmas tree cards –
What You Need: Christmas paper, Blank Cards, Glue, Markers
Simply glue your design onto Christmas card blanks, and your personalized card is ready to share with friends and loved ones. It’s a great craft for kids, families, or classrooms, and a heartfelt alternative to store-bought cards.
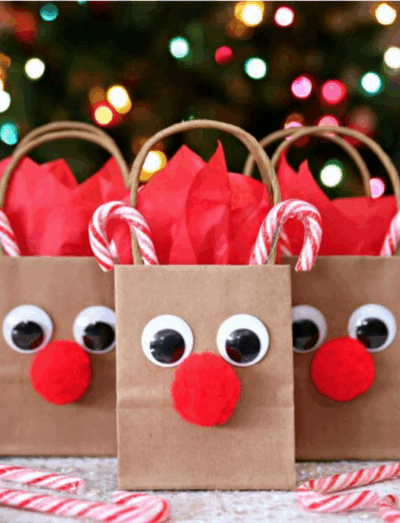
2. Level easy – Reindeer gift bags –
What You need – Small Brown Gift Bags , Red Pom Poms ,Googly Eyes Candy
Canes , Glue Dots or Glue Gun with Glue Sticks
Using brown paper gift bags, googly eyes, pom poms and candy canes glue the googly eyes and pom poms top the gift bag to make a reindeer face and then create horns with the candy canes.
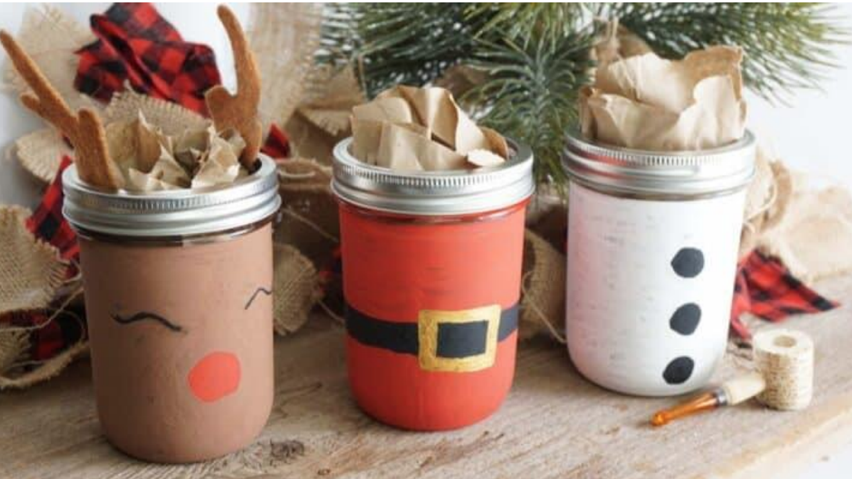
3. Level intermediate – Mason jar decorating –
What You need: Mason Jars, Tempera
Paint or Acrylic Paint, Pencils, Paint Brushes, Antler Template , Brown Felt
(Rudolph’s antlers)
Modge Podge.
– First, make sure your mason jars are really clean. You can wipe them down with a paper towel. The paint is going to stick to whatever is there, so
if you do have some kind of label or sticky glue leftover from a label, the paint will stick, but it’s going to show that texture too, so just clean it off. Next, use your acrylic paint and pencils to create any design you want; it can be Santa, it could be a reindeer or anything else that is Christmas themed.
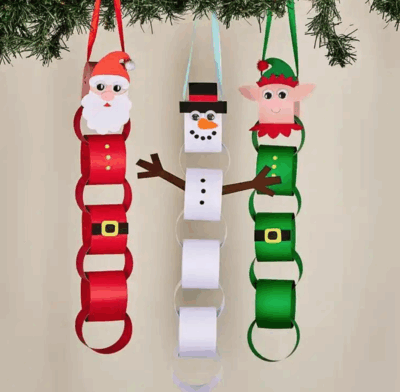
4. Level easy- Festive paper chains –
What You need: Recycled paper, magazines or old carol song sheets
Glue or sticky tape, Scissors
Cut your chosen paper into strips – you can keep cutting as you go if you need more. You don’t need to be precise with these, but you don’t want them to be too thin or short, so aim
for around 5cm by 20cm. Take one strip of paper and curl around so the two ends meet. Glue one end to the other and hold for several seconds until fairly dry. You can use sticky tape or a stapler to connect the ends if you prefer. Feed your next strip through the middle of your first chain link. Curl the ends of the second strip together until they meet and then fasten as before.
Repeat until you’ve reached the length of chain that you want. Then all you need to do is find somewhere to hang your finished festive paper chain.
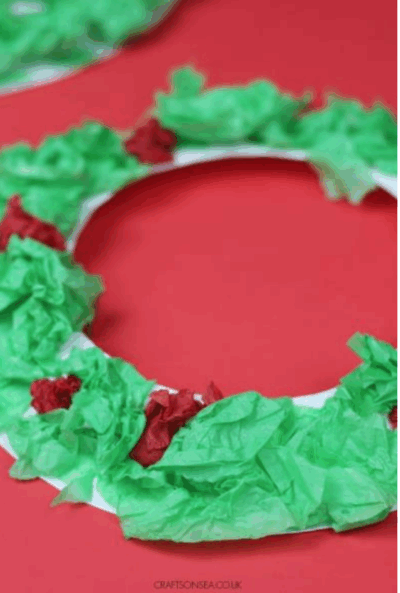
5. Level easy – Paper plate wreath –
What you need: Paper Plate, Glue, Scissors, Tissue Paper
Prepare the plate for your child by carefully making the paper
plate ring. You can do this by using the sharp end of a pencil to
push through the centre of the plate (onto blue tac or
playdough) and then cutting out the center of the paper plate
using scissors. Next up is gluing, either encourage your child to
squeeze glue across the paper plate wreath or they could
spread it over the plate with a glue spreader. Grab some red and
green tissue paper and tear it up in to pieces, this is such a nice
sensory material to work with and of course it’s a good excuse
to talk about how it sounds and how it feels. Squish the tissue
paper up into balls and stick it onto your paper plate to decorate
it. If you’d like the red ‘holly’ bits to be a bit more spaced out the
you could always glue these down first and then add the green
‘leaves’ afterwards but I think however your child does it is
pretty much perfect anyway.
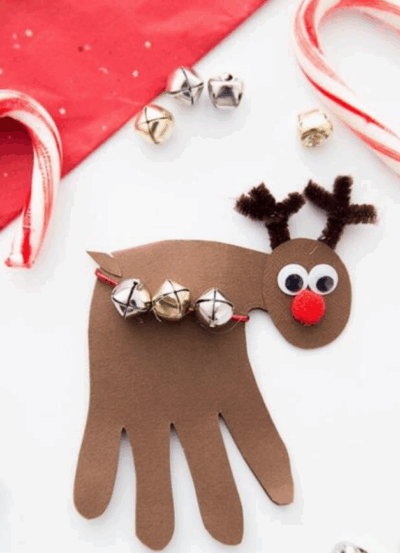
6. Level easy – Handprint reindeer:
What you need: Construction paper in various colors Glue stick School glue or white craft glue, Scissors, Googly eyes, Pom poms, Markers or crayons, Buttons, sequins, pony beads, etc
Trace the child’s hand onto brown construction paper.
You will also need to cut out an antler and a little oval for the tail (if you like).
Use a glue stick to add those to the hand shape.
Next, use a brown or black marker to add Rudolph’s collar.
I used a gold paint pen to add the bells. Gold paint would work too, simply dip the handle of a paintbrush in the paint and dot on.
A googly eye and glittery red pom pom finish your reindeer off.
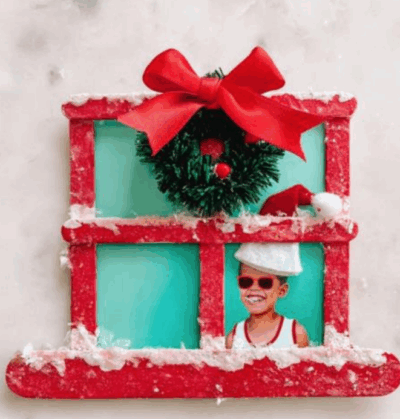
7.Level hard – Popsicle stick winter window ornament:
What you need: Ice lolly sticks (5 per ornament), Jumbo ice lolly sticks (1 per ornament), Hot glue gun (for adults use only!), Paint and paintbrushes (In any colors you choose, plus white), White glitter, Iridescent faux snow
Mod podge
4×6 photos OR photos and solid color cardstock to glue them to
Mini craft wreaths, Santa hats, ribbon or other decorations
Twine
Felt (optional, for baking)
1. Hot glue three popsicle sticks, evenly spaced, to a jumbo popsicle stick.
2. Flip over and glue two popsicle sticks, horizontally, over top of the three vertical lolly sticks.
3. Let the kids paint the popsicle stick windows however they please. Let dry
completely.
4. Paint the top of the bar across the window, and the window sill white. This will act as a background so the white glitter and snow pops. Let dry.
5. Cover the white paint with Mod Podge. Let the kids sprinkle the glitter and snow on top. Shake off excess. If desired, you can then add Mod Podge and glitter to the rest of the window. Let dry!
6. Add Santa hat to photos, if desired.
7. Hot glue the photo to the back of the window. If you’re not using a 4×6 photo, you can cut out the photo of your child and glue it to a solid color background. Then glue that to the window. Trim excess paper so it fits within the window. Glue the wreaths or other decor to the front of the window as desired.
9. Cut a piece of twine and tie to make a loop. Glue the knot to the back of the
photo.
10. Cover the back of the photo with a piece of felt. This isn’t necessary, but helps give the back a clean look.
